5 Project Resource Planning Practices you need to Focus on!

Posted on August 14, 2021August 24, 2021Categories House Decoration   Leave a comment on 5 Project Resource Planning Practices you need to Focus on!

Laughing businesswoman working in office with laptopIf your project is successful, it is often because of an organized execution and the best people to do the job. Have you ever wondered why some resources are more effective than others?

What if I told you that not every company executes Project Resource Planning (RPR) effectively? What if there were Kendo self-hosted Project Management practices or habits that could be adopted by everyone which would help your projects run smoother, be better organized and increase productivity?

Let’s talk about five things companies can do to improve their RPR processes! You should always ensure you’re using the RASCI model when organizing your project tasks and assigning people to them. The RASCI model includes: Responsible Active Supportive Consulted Inactive Here’s a visual representation: Basically if you don’t utilize all the roles, you’re not doing it right.

The Importance of RPR in Project Management To reiterate and add a bit more to what was said above, here’s why using this model is so important: Responsible – This means making sure that the person actually has all the information they need to execute their task(s). If you have any doubts, find out! Active – Include people who are active communicators and easy to reach. It’s one thing if they’re early adopters or self-starters but another if there are questions on where things stand at any given moment. Supportive – These people are just as crucial as the other two because they give feedback and can help ensure that tasks are carried out with accuracy. Consulted – This is your go-to point for people who have questions and aren’t sure how things are supposed to be done or what’s expected. Inactive – Everyone needs a little break sometimes but inactive means they’re not participating in the project.

Man in Black Crew Neck T-shirt Sitting Beside Woman in Gray Crew Neck T-shirtEmpower, involve and inspire your team by making them feel involved in whatever you do as a Project Manager! The most efficient way to manage projects effectively is through communication! You may even start seeing an improvement in how much work gets done on time, within budget and without issues- because of this alone! But what about any other projects? What about when responsibilities are unclear? Or if someone hasn’t been consulted? Look at it like this: If there are any questions or confusion about a project, it’s going to take up time which could lead to your team getting burnt out.

Ideally, the best way for projects to run smoothly is through communication! It’s essential that you have an engaging and supportive environment where people feel valued and appreciated. Don’t underestimate the power of a good RPR process in both quantity and quality!

How To Choose The Right Deck Railing For Your Project And Install It Correctly

Posted on August 13, 2021August 24, 2021Categories House Decoration   Leave a comment on How To Choose The Right Deck Railing For Your Project And Install It Correctly

There are two basic deck railing systems available to the homeowner and a third is now rapidly becoming popular. The most common of these three is the pressure-treated wood baluster with bottom rail system sold in lumber yards and home centers across the country. The second type is a cedar or redwood picket with bottom rail system that uses support posts at regular intervals along each side of the deck. The newest deck railing system involves using only half round pickets (or panels) made from composite materials such as recycled plastic, wood fiber or aluminum alloys which do not need any hardware at all other than 2x2s placed between them every 8 inches or so for added strength.

The first question you should ask yourself when designing your deck is what type of system will look best with the overall style and architecture of my home. Then also determine if you need the major support offered by a deck railing system that uses posts placed in the ground every few feet across your yard, or whether or not the more minimalist design of an all picket or half-round panel fence will be sufficient to meet your needs and complement your home and property.

Another fundamental concern when choosing a deck railing for your wooden decking project is how well it will resist decay from moisture, both from rain as well as being constantly exposed to water vapor rising up off the ground below. If you live in areas where there’s a lot of snowfall during winter months then this factor becomes even more important so it’s even more crucial to choose a deck railing that is designed for harsh outdoor environments. Additionally you’ll need to consider if the system you choose has enough weight and density to resist being easily pushed over by adults or children leaning on it, or perhaps strong winds that might occasionally occur.

The first type of deck railing most people think of when they decide to create an attractive barrier around their wooden decks is the pressure-treated wood baluster with bottom rail option made available from lumber yards and home centers across the country. This system uses pressure-treated 2x4s as posts placed every 8 feet or so apart in the ground sunk at least 6 inches deep so they won’t move about during wind storms. Then straight ¾ inch x 1½ to 2 inches pressure-treated wood balusters are used for the side rails and top rail, with bottom caps added to the end of each post and at the ends of the horizontal boards. This is a very common deck railing system that has been around forever as it’s considered one of the most economical ways to enclose your deck area while still offering strength and durability.

Pressure treated wood has been used in America since before WWII when this was considered an innovative use of wartime surplus lumber. Today an estimated 4 out of every 5 decks built in America or Canada utilize some type of a pressure-treated wood product whether for its strength, low cost, fast availability or ease in application. Pressure-treated lumber comes from woods such as Western Red Cedar and other species that are naturally resistant to rot, decay and insect attacks but have been processed with a preservative treatment (such as TCC) in order to make them even more resistant to rotting.

How to Build a Deck

Posted on February 17, 2021February 15, 2021Categories House Decoration   Leave a comment on How to Build a Deck

The deck is an excellent resource to enhance your home; with the help of deck builders in San Antonio, you can use it in many ways, and it will have a key element for your decoration. A few years ago, the deck resembled those old ship decks, which had several functions besides beautifying the environment.

Over time, the deck has been incorporated as a decorative element in homes, usually around swimming pools or in gardens, demarcating the green area; now, the deck is highly used as a decoration even inside the houses.

The decks can be made of various materials, such as porcelain, plastic, and cement flooring; however, the original and even more used material is wood. This is because the wood is warm and brings an air of comfort and warmth to the environment. They claim both through color and use.

Modular Wood Deck

This type of deck is mostly used for outdoor areas, such as swimming pools, backyards, and gardens. Thus, it is essential that the woods are waterproofed. So your deck will not suffer wear and tear due to exposure to sunlight and moisture from the ground or due to rain.

Traditional Wood Deck

Undoubtedly this is the most popular and used deck type. After all, this is quite versatile and can be used both indoors and outdoors. In addition, the traditional wooden deck is even more beautiful and sophisticated, although it can give a more rustic touch if you want.

To prepare the structure of this deck and its installation must be done by a qualified professional such as deck builders in San Antonio. It is worth saying that this investment is of paramount importance because only then will the installation be done properly and visually well done.

Below you will see the step by step of assembling the deck; however, we recommend that for the safety of your investment, you hire a qualified deck builders in San Antonio professional.

The assembly of this type of deck is laborious, but it looks incredibly beautiful and is very worthwhile. If you decide to do it yourself, get the information from a professional beforehand, hire a cabinetmaker to carry out the measurements so that the deck fits perfectly in the environment you need.

Installation

Installing a wooden deck is much more than simply placing it somewhere in your home. It requires planning and attention to detail. Such as stability, durability, and aesthetics.

Planning and buying wood

Plan the place where you want to place your deck and structure it so that it fits precisely in the desired space. In this way, it is ideal that the joiner himself measures the measurements; this prevents errors and unnecessary expenses.

When buying wood, choose one of the standard sizes, so the size of the boards will be uniform. However, if for some reason they do not fit, ask your joiner to cut the board to the ideal size to fill in what is missing for the fitting.

In addition, we recommend wider strips, because the larger, the fewer the amendments. So, the deck is visually cleaner and more beautiful.

Starting to assemble the Wooden Deck

This tip is essential for the correct installation of a deck, hire a professional to concrete the floor and fix two parallel wooden slats, which later will be the fixing points of the deck.

First, the slats must be 15 cm above the ground; this will allow the slats not to be in direct contact with soil moisture, increasing the useful life of the wood used. A maximum distance between rafters of 40 cm is recommended. After placing the slats on the structure, insert the deck boards across the structure slats. Fixing can be done with a galvanized screw, galvanized nail, or pin.

The best way to accomplish this step is to mark with a pencil where the next board will be and place a nail to mark. After nailing the board, just remove the nail and repeat this whole process.

After that, sand the entire structure, rule by rule, so that no splinters remain. That way, it won’t hurt anyone and will still prepare the surface to be waterproofed. First of all, check if the used wood is already waterproofed and worked.

Waterproofing Deck Wood

If the wood is not treated and waterproofed – especially if you choose demolition wood, you should waterproof it to protect it from the sun and rain; in addition to giving more beauty and sophistication to the deck to waterproof the deck, you can apply common varnish or stain.

However, we at deck builders in San Antonio have no doubt that one of the best tips on how to build a deck is to use stain to waterproof. For those who do not know, the stain is a resin with a decorative effect that highlights the beauty and natural color of the wood, combats the formation of fungi, pests, and termites, in addition to repelling water.

Attention, this tip may seem superfluous, but it is a key point in the assembly of your deck. This is because when decks are poorly designed, they can have cracks and warp the slats. Usually, it is due to the poor quality of the wood and if the space left at the time of assembly is not the correct one.

Protect Your Bathroom From Insects

Posted on January 11, 2021January 11, 2021Categories House Decoration   Leave a comment on Protect Your Bathroom From Insects

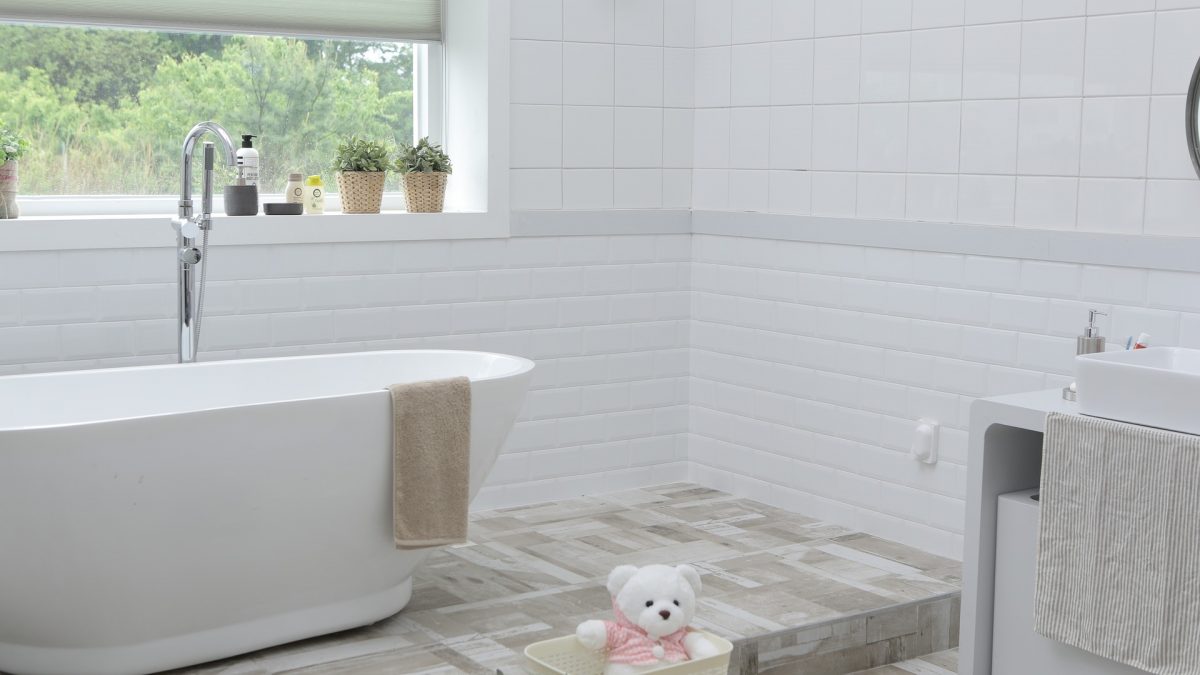
When it comes to remodeling projects, the bathroom is usually a priority. This may be due to the fact that it receives the most visitors and that it must offer maximum convenience to its users. However, if you’ve noticed that bugs are your most frequent guests, the tranquility and enjoyment of your washroom could be in jeopardy.

Whether it’s cockroaches, ants, spiders, or other insects, these critters love the toilet for several reasons. Don’t worry – there is a solution. We’ve compiled some tips to help you get rid of bugs in the toilet.

Why are insects attracted to humidity in bathrooms?

Contrary to popular belief, floral scent soaps and potpourris are probably not the main cause of bugs in your bathroom – although they are a great decoration. In fact, most common household insects are attracted to moisture.

The insects feed on organic matter and thrive in humid areas. When water is splashed on the floor or countertops, accumulated condensation can lead to moldgrowth . Plus, poor ventilation can cause liquid and soap residue to adhere to your surfaces, giving bugs a reason to come back. By reducing splashing and wiping off drips, you can prevent the bathroom from being invaded by insects.

Keep bugs out of your bathroom

If your bathroom has been a bug hotel lately, rest assured that there are ways to end it. Since these critters appreciate humidity, it’s best to tackle any leaks or mold problems first . Making cleanliness a priority could make all the difference.

Once a critter ends up in cracks and toilet openings, it can be difficult to prevent others from following it. If you’re wondering how to get rid of bugs in the bathroom, try these tips.

  1. Keep the bathroom dry – Wipe down counters regularly to prevent water build-up. Stagnant water can also collect in the curves of dormant pipes. To prevent bugs from entering the bathroom drain, mix half a cup of salt and baking soda and rinse with a cup of white vinegar.
  2. DIY natural insect repellant – In a good-sized bowl or jar, mix equal parts sugar, water and white vinegar, adding about 5-10 drops of dish soap. You can also pour boiling water down your sewer once or twice a day to reduce the number of flies that might stay there – but be very careful.
  3. Seal Openings – Repair cracks or gaps around walls, especially those near the floor or ceiling. Replace damaged window screens as soon as possible. Broken tiles or cracks in the floor can also store moisture, so it is best to fix them in a timely manner.
  4. Renovate old appliances and furniture – If your bathroom furniture is old and run down, it may be time to renovate it. Carpenter ants eat old wood, and other insects can spread dangerous pathogens. If bugs have taken up residence in your furniture, replacing them could solve more problems than you might think.

What Wood For Exterior Joinery?

Posted on January 10, 2021January 11, 2021Categories House Decoration   Leave a comment on What Wood For Exterior Joinery?

Wood is a recyclable, high-performance and adaptable natural material that you can use on your various sites for exterior carpentry work. Nature is made up of so many species of wood that it is difficult to know which wood to choose for your carpentry work. Wondering which wood to use for your various exterior carpentry work, we invite you to discover the ideal solution to enhance your exterior.

Pine

Pine is undoubtedly the most widely used wood species for fittings and exterior carpentry. Pine is a resinous wood ranging from creamy white to yellow. There are several types such as Carolina Pine also called Yellow Pine, Laricio Pine or Corsican Black Pine, etc.

Whether it is for the realization of moldings, doors, frames, etc., pine is a species that offers you perfect resistance to bad weather and guarantees an excellent finish in terms of aesthetics.

Teak

If you are a fan of tropical products, you may choose to use teak for your exterior carpentry work . This precious and rot-proof wood species is recognized for the elegance and durability it gives to your creations. Teak is identifiable by its yellow-brown color and black veins. Although it remains one of the most expensive species on the market, it is excellent precious wood for your furniture and outdoor work.

The Douglas

Douglas fir, also called Oregon pine, is a wood species offering one of the best durability on the market. With its brownish yellow color and the pretty patterns it represents, this wood for exterior joinery is a wood species that is easily used for your exterior carpentry work for its good mechanical characteristics. However, to ensure its longevity, you must take care to dry it well, so that there is no resin exudation after installation.

The larch

Larch is a resinous wood species with great durability that is ideal for all exterior joinery. Still called Larche, it is recognizable thanks to its reddish-brown color and its veins almost parallel to each other.

Economically, this wood for exterior joinery guarantees an excellent quality / price ratio. However, Larch is a very difficult wood species to find. For optimal use, Larch may require treatment.

The Ozk

Oak is a solid and very aesthetic wood originating in Europe, used for carrying out external carpentry work . This light wood species is characterized by its grain which gives it a unique appearance. With no real disadvantages, apart from its cost, this type of wood is resistant to all the vagaries of nature. Oak offers great resistance, good aesthetics and provides a multitude of finishes.